
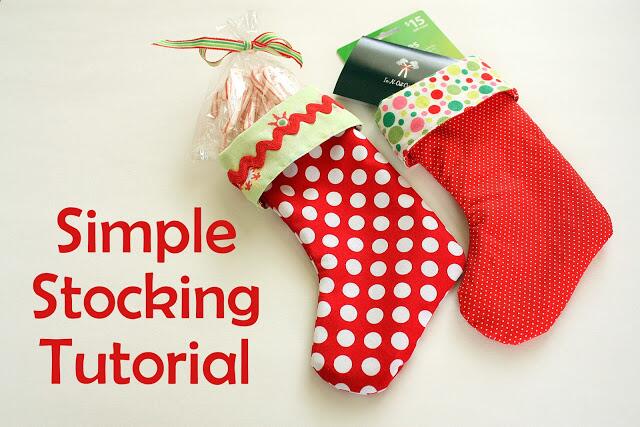
Today I¡¯m sharing a super EASY method for making lined stockings.
This little stocking is a festive way to hold gift cards, some treats, or any other small gift you
want to dress-up a little. The great thing about this method though, is that you can blow-
up the stocking pattern and make stockings as big as you want by following the same,
easy process.(And who doesn¡¯t sometimes want new, hip stockings to impress Santa?)
So start by printing the stocking pattern or designing one of your own.
Fabric requirements need to be enough fabric to cut two stocking shapes from
two different fabrics. For this size stocking you will need an 11¡å x 14¡å piece of fabric for
front and back outside pieces and another 11¡å x 14¡å piece for front and back lining pieces.
(1 Fat Quarter would be enough for all four pieces, but they would all be the same.)
With wrong sides together, cut TWO stocking shapes of both your outside fabric and your
cuffner fabric. IMPORTANT: make sure your toe faces both directions for each fabric.
(This is why matching wrong sides together will help you get pieces facing both directions.)
Now pair up one outside fabric with one lining/cuff fabric with the toes pointing the same
direction like this. (See picture above.) Match the outside fabric and lining fabric from each
set right sides together and sew a 1/4¡å seam along the top of the two pieces. Open pieces
up and press seam open. Repeat for back side.
Now match front and back pieced units right sides together with outside fabrics matchedp and lining fabrics matched up. Center seams should match up too. Pin to hold two sides together. Leaving a space in the lining fabric for turning right side out, sew all the way around the outside edge of the stocking pieces (-where gray line is drawn.) Click on picture to see closer view.
I sewed a 1/4¡å seam allowance around the outside [polka dot fabric] and 3/8¡å seam
allowance around the green lining fabric, except the space left open for turning.
This will help remove some of the bulk of the lining fabric. But if that¡¯s too confusing,
just sew 1/4¡å for all.
Before you turn everything right side out, cut notches in the curves ¨Cespecially the toe.
This will help the toe look nicer when finished. Be careful not to clip through the seam.
On the liner side, clip the fabric close to the seam.
This will also help remove some bulk on the lining.
Now pull everything right side out. Carefully shape the outside part until the curves look good and press.
Tuck the open ends into the
stocking and topstitch the opening closed.
Now carefully tuck the lining inside the stocking.
Optional: Top stitch around the top edge for a more finished look.
Fold cuff down and carefully shape stocking.
Optional: add decorative trim if you want.


